

Load Your Data
Load your first four tables into Keboola Storage with the HTTP data source connector, pulling the sample CSV files straight from a URL.
Nothing in Keboola happens until there is data in Storage. This step puts four tables there using a data source connector — the thing that does all real loading in Keboola. Step 2 of the Getting Started arc.
What you need
Section titled “What you need”A Keboola project you can sign in to. If you do not have one, start with Get a Project.
Nothing to download — the connector fetches the files itself.
The sample data
Section titled “The sample data”Four small tables describing a sales pipeline: opportunities, the accounts they belong to, the users who own them, and each user’s seniority level. They are published here, and the connector reads them over HTTPS:
| Table | File |
|---|---|
| opportunities | /getting-started/opportunity.csv |
| accounts | /getting-started/account.csv |
| users | /getting-started/user.csv |
| levels | /getting-started/level.csv |
All characters in this data are fictitious, and any resemblance to real persons, living, dead, undead, unborn, or otherwise semi-existent is purely coincidental.
How loading works
Section titled “How loading works”Data gets into Keboola through data source connectors — components that fetch from a source on demand or on a schedule. There are hundreds of them: databases, APIs, ad platforms, cloud drives. They differ in how they authenticate and what they can fetch, but they all end the same way: rows in a Storage table.
You will use the HTTP connector, which downloads CSV files from a URL. It is the simplest one that still behaves like a real connector — it can be re-run, scheduled, and dropped into a flow, which is what step 5 depends on.
One configuration can fetch many files, so you will build a single configuration holding four tables rather than four separate configurations.
Create the configuration
Section titled “Create the configuration”-
Open Components and search for
HTTP. Two results come back — pick plain HTTP (Data Source), not HTTP Advanced, and click Add Component.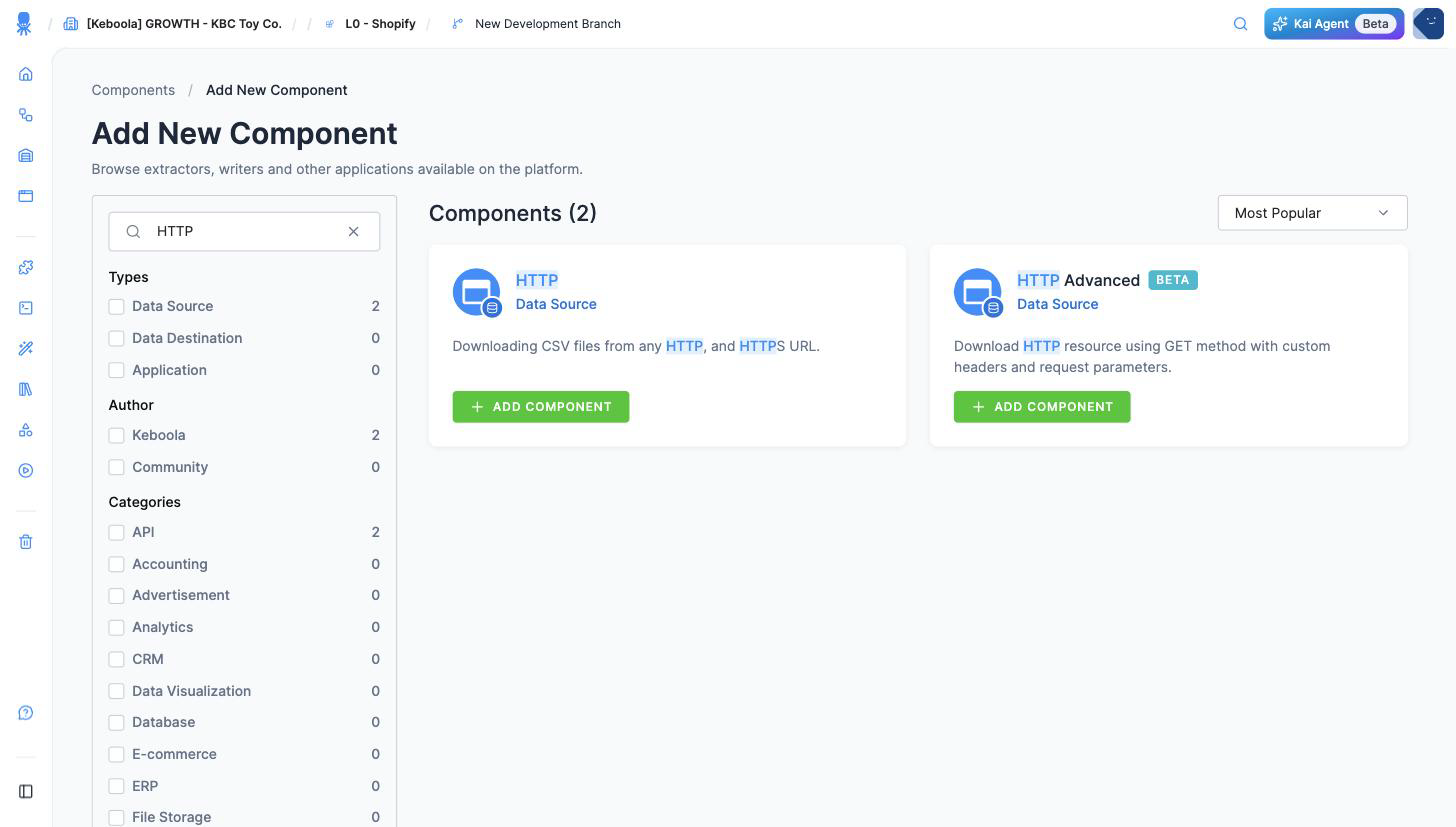
-
Choose Connect To My Data. (Use With Demo Data sets the connector up against a dataset Keboola prepared — handy for a look around, but here you want your own URL.)
-
Replace the suggested name with
[TUTORIAL] Sample data, add a description, and click Create Configuration. Descriptions are what keep a project readable six months later; see the best practices cheat sheet.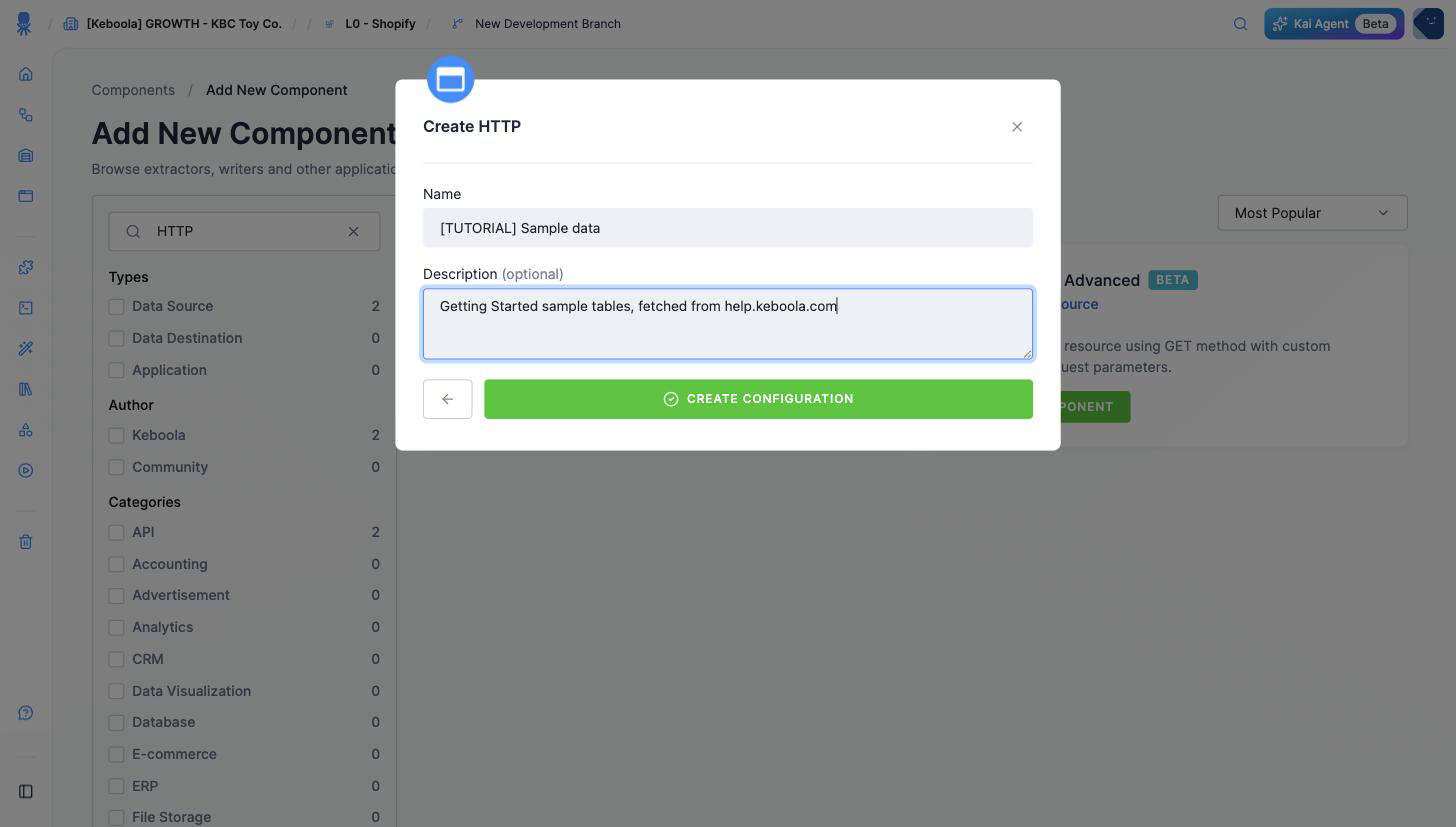
-
Open Base URL and Connection Options and set Base URL to the prefix shared by every file this configuration downloads, then click Save:
https://help.keboola.com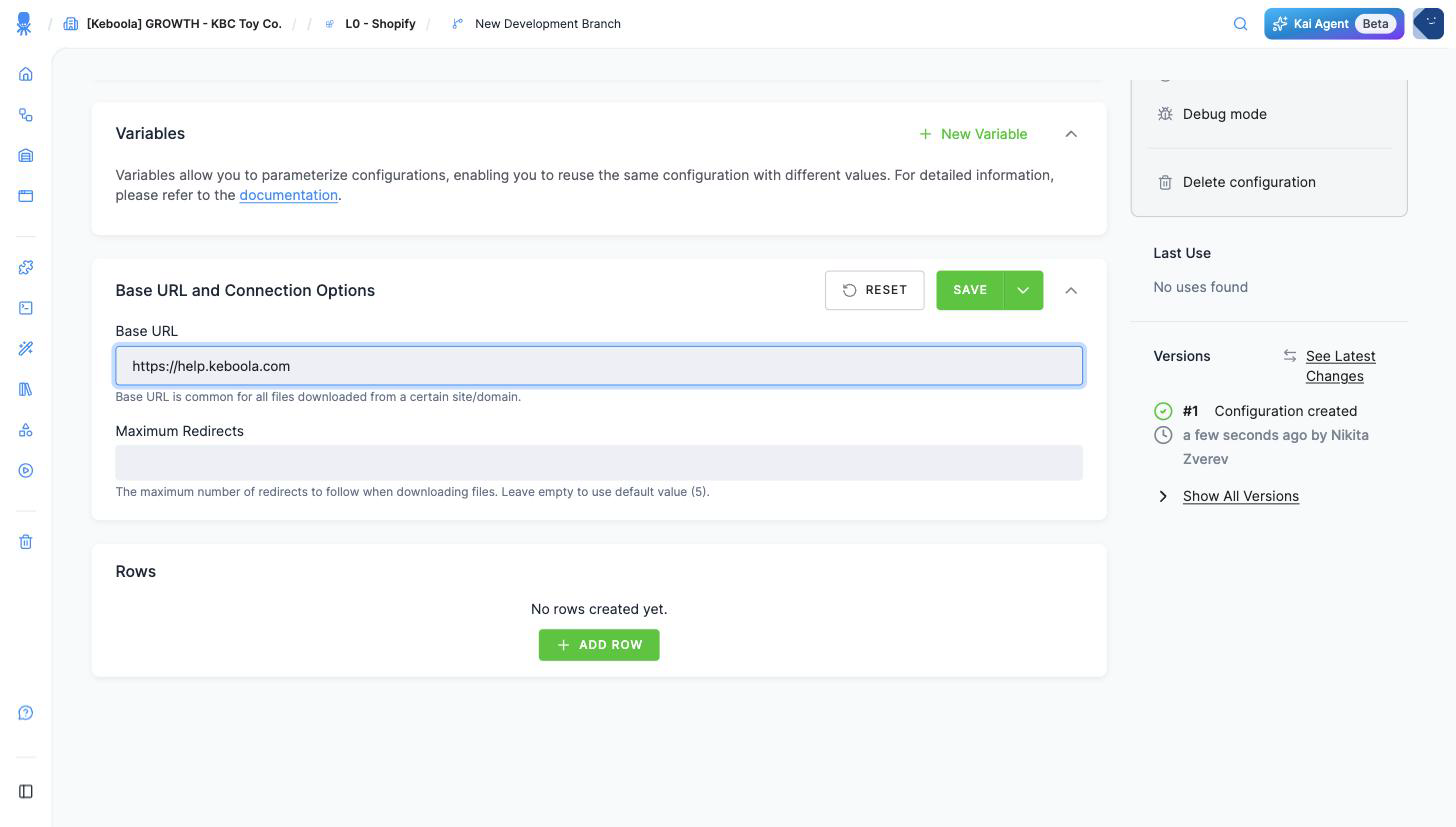
Add the four tables
Section titled “Add the four tables”Each file is a configuration row — its own path and settings, sharing the configuration’s base URL.
-
In the Rows section, click Add Row, name it
opportunity, and click Create. The row name becomes the Storage table name, so use exactly this spelling. -
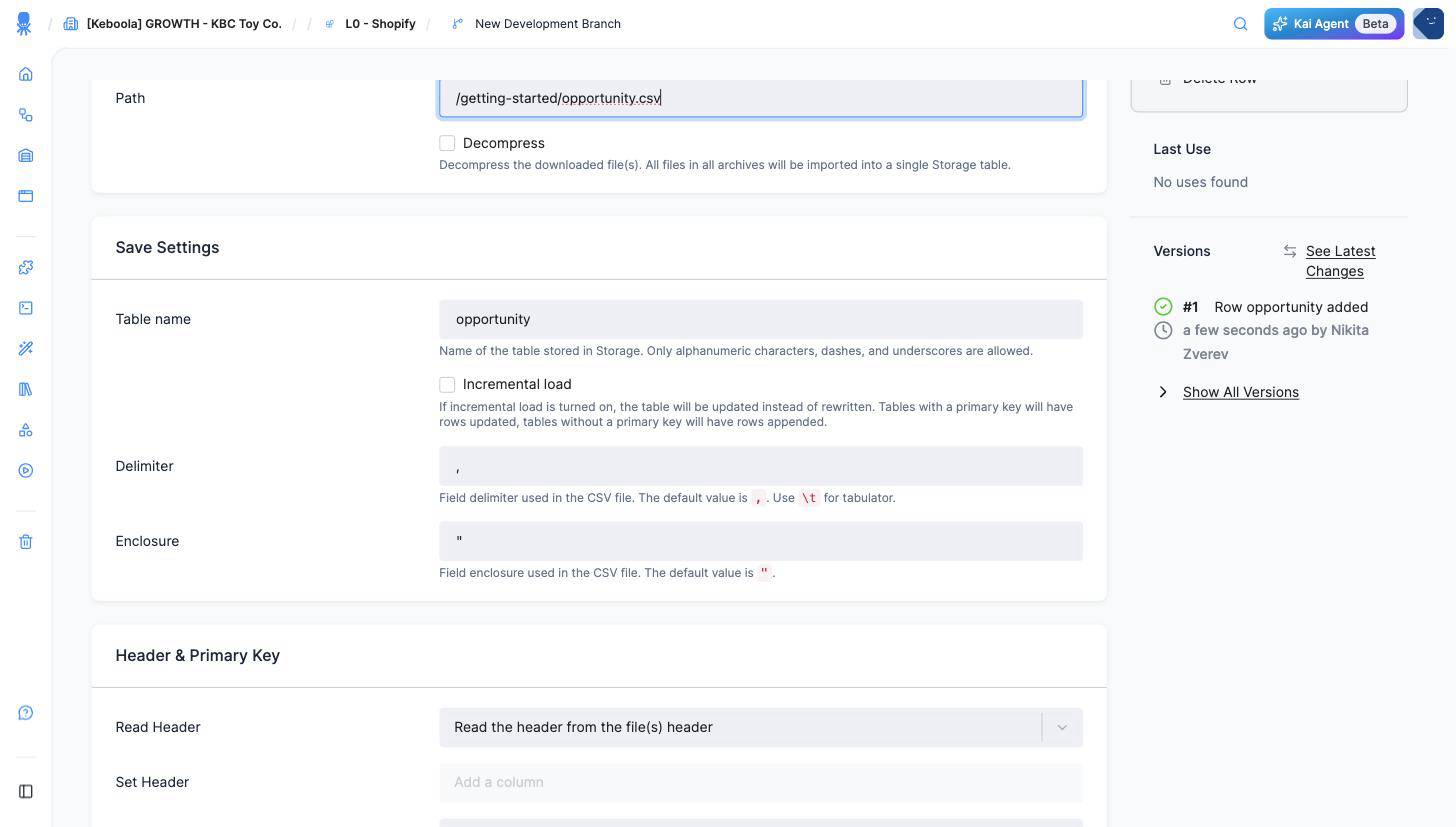
Under Download Settings, set Path to the file, relative to the base URL:
/getting-started/opportunity.csv -
Check the rest of the row and click Save:
- Save Settings → Table name is already
opportunity, taken from the row name. - Delimiter
,and Enclosure"are already right for these files. - Leave Incremental load off: each run should replace the table, not append to it.
- Header & Primary Key → Read Header already reads Read the header from the file(s)
header, which is what you want — the sample files carry column names on the first line.
Leave it alone. (The alternatives are typing the columns yourself or having them generated
as
col_1,col_2, ….)
- Save Settings → Table name is already
-
Repeat steps 5–7 for the other three files:
Row name Path account/getting-started/account.csvuser/getting-started/user.csvlevel/getting-started/level.csv -
Back on the configuration, click Run Component and confirm with Run. One job fetches all four rows.
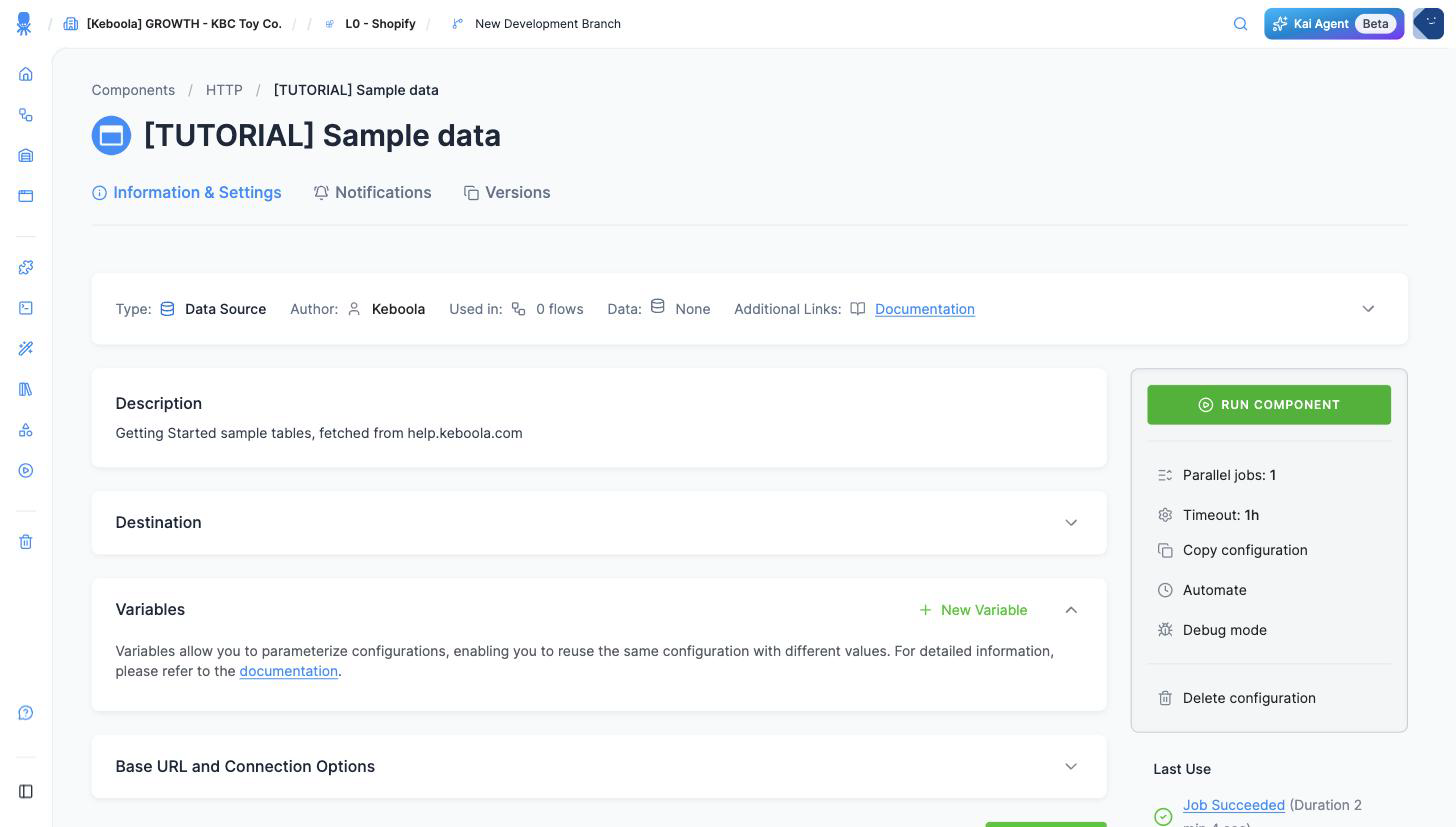
Check it worked
Section titled “Check it worked”Watch it in Jobs. The rows are fetched one after another, so expect a couple of minutes for all four — the run behind these screenshots took 2 minutes 4 seconds.
Then open Storage. Data lives in buckets, and each bucket holds tables. The connector
created a bucket of its own — its name is the component plus the configuration’s ID, like
keboola-ex-http-01kz5050bhhezq9scmd0t9c73f, shown with an IN badge — holding four tables:
opportunity, account, user and level.
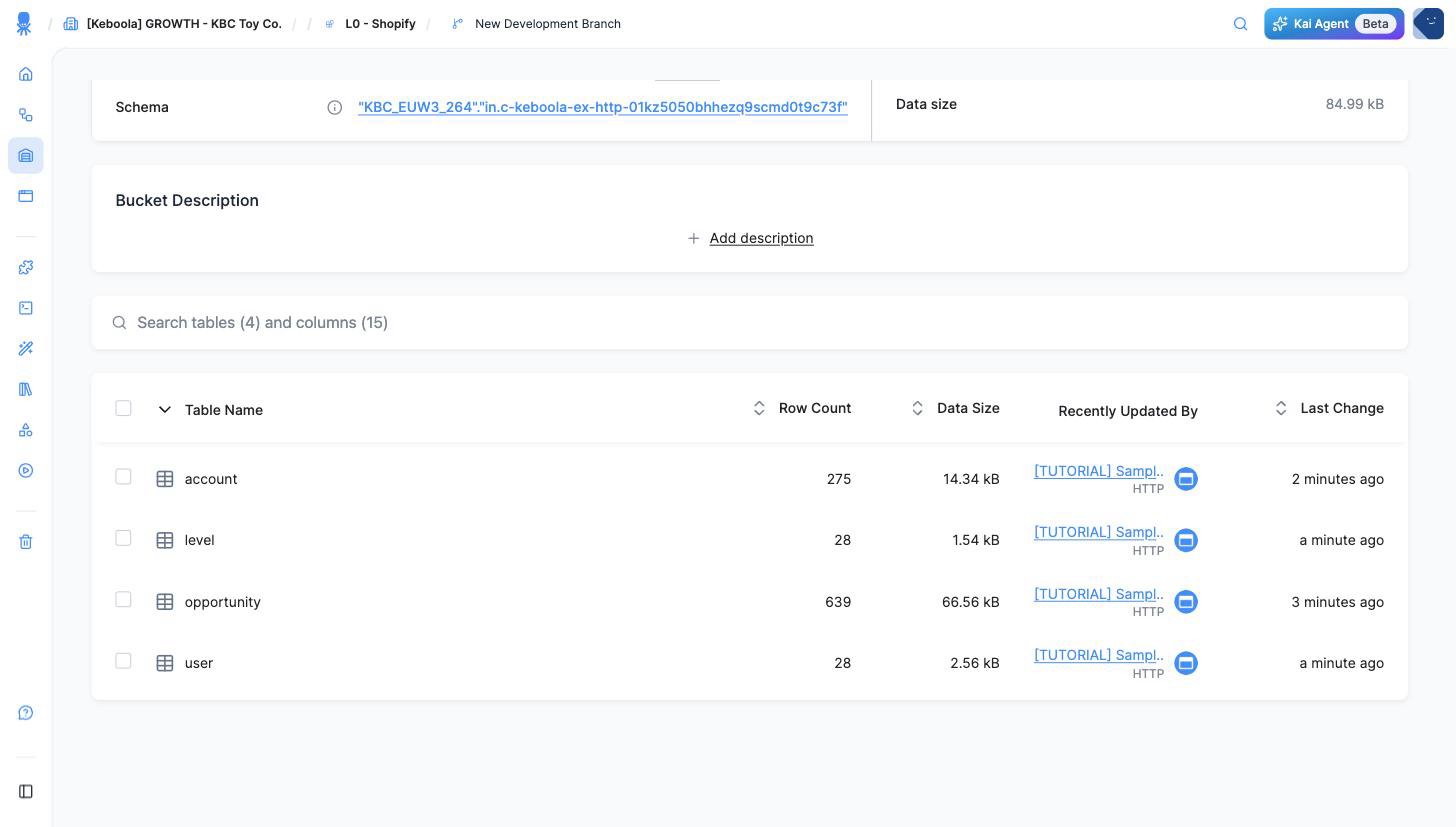
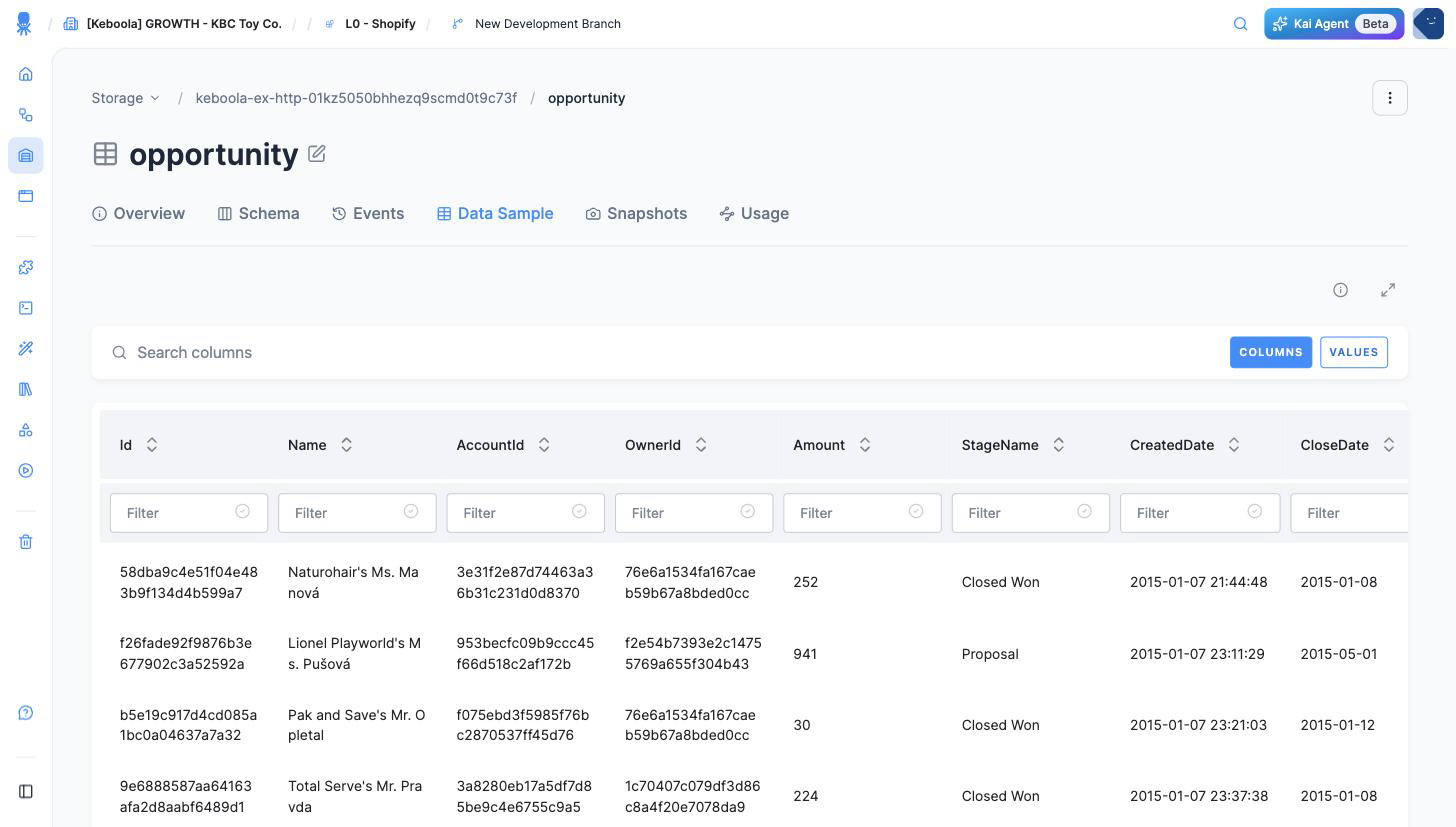
Click a table and open its Data Sample tab to see the real contents. opportunity should
have 639 rows with columns like AccountId, Amount and StageName; account 275; user and
level 28 each. If that matches, this step is done.
If it goes wrong
Section titled “If it goes wrong”- The job fails with a 404. The path is wrong, or missing its leading slash. Base URL and
path are concatenated, so
https://help.keboola.com+/getting-started/user.csvis right, while a base URL with a trailing slash gives you a double slash. Open the full URL in a browser to see whether the file is really there. - Every row arrives as one column. The Delimiter setting does not match the file. These files are comma-separated.
- The first data row is missing, or columns are called
col_1. Wrong header option — set Read Header back to Read the header from the file(s) header. - The table is empty but the job succeeded. The URL returned an HTML error page instead of a CSV. Open it in a browser to see what actually comes back.
- You want the four files fetched at the same time. Raise Parallel jobs on the configuration — the connector then processes its rows concurrently.
Going further
Section titled “Going further”- Load from Google Sheets — the same data pulled from a spreadsheet, with an authorized account instead of a public URL.
- Load from a database — the pattern every database connector follows.
Next: Transform your data →